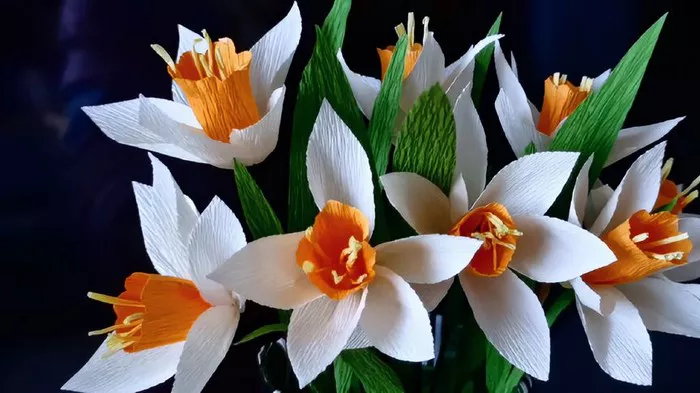
Paper crafting is a timeless and rewarding hobby that allows individuals to express their creativity while producing beautiful, lifelike creations. In this comprehensive guide, we will delve into the art of making paper daffodil flowers – a charming and vibrant addition to any floral arrangement or home décor. Follow the detailed steps below to create your own stunning paper daffodils and bring a touch of spring into your living space.
Materials Needed:
Before diving into the crafting process, it’s essential to gather all the necessary materials. The beauty of paper crafting lies in its simplicity and accessibility. Here’s a list of items you’ll need to create your paper daffodil flowers:
1. Colored crepe paper in yellow, white, and green shades
2. Floral wire or green pipe cleaners
3. Craft glue
4. Scissors
5. Pencil
6. Template or stencil of a daffodil flower (available online or create your own)
Step 1: Prepare the Materials
Begin by laying out all your materials in a well-lit and spacious workspace. Make sure you have ample room to maneuver and organize your supplies. Take a moment to review the template or stencil you’ve chosen for your daffodil flower, ensuring it aligns with the size and style you desire.
Step 2: Cut the Crepe Paper Strips
Take the yellow crepe paper and cut it into strips of varying lengths. The length of the strips will determine the size of your daffodil petals, so consider the dimensions you want for your finished flower. The strips can range from 2 to 4 inches in length, with the width being approximately 1 inch.
Step 3: Create the Petals
Fold each strip of yellow crepe paper accordion-style to form pleats. Once folded, use the scissors to round off one end of the strip, creating a petal shape. Repeat this process for all the strips, adjusting the size and shape of the petals as needed. This will serve as the foundation for the daffodil’s trumpet-shaped center.
Step 4: Assemble the Center
Gather the rounded ends of the pleated strips and secure them together using craft glue. This will form the central trumpet-like structure of the daffodil. Hold the pieces in place until the glue dries, ensuring a sturdy and well-defined center for your flower.
Step 5: Cut and Shape the White Petals
Now, shift your focus to the white crepe paper. Cut smaller strips than the yellow ones, as the white petals will be layered around the central trumpet. Repeat the accordion folding process for the white strips, adjusting the size to create smaller, delicate petals.
Step 6: Attach the White Petals
Carefully glue the white petals around the yellow trumpet-shaped center, ensuring they are evenly spaced and overlap slightly. The layers of white petals will add dimension and realism to your paper daffodil. Hold the petals in place until the glue sets.
Step 7: Shape the Green Stem and Leaves
For the stem and leaves, use green crepe paper or green pipe cleaners. Cut a long strip for the stem, twisting it around the floral wire or pipe cleaner. Attach the stem to the base of the daffodil by wrapping it securely and gluing it in place.
Cut leaf shapes from the green crepe paper and attach them along the length of the stem. To add a natural touch, gently crinkle the leaves to mimic the texture of real daffodil foliage.
Step 8: Refine and Adjust
Take a moment to review your paper daffodil and make any necessary adjustments. Ensure that the petals are evenly spaced, the colors are balanced, and the overall shape is pleasing to the eye. Don’t hesitate to trim or add elements as needed to achieve the desired look.
Step 9: Create a Bouquet
Once you have mastered the art of crafting individual paper daffodil flowers, consider creating a bouquet. Experiment with different sizes and colors, arranging the daffodils in a vase or tying them together with a ribbon. This allows you to showcase your creativity and makes for a stunning centerpiece or gift.
Step 10: Share Your Creation
The joy of paper crafting is not only in the process but also in sharing your creations with others. Capture your paper daffodils in photographs and share them on social media platforms or within crafting communities. Inspire fellow crafters and engage in conversations about techniques and variations.
Conclusion
Creating paper daffodil flowers is a delightful and fulfilling craft that allows you to bring the beauty of nature into your home in a unique way. With a few simple materials and a touch of creativity, you can produce stunning paper daffodils that rival their natural counterparts. Whether you’re a seasoned crafter or a beginner, this step-by-step guide provides the foundation for a rewarding and enjoyable crafting experience. So, gather your materials, unleash your creativity, and let your paper daffodils bloom!


