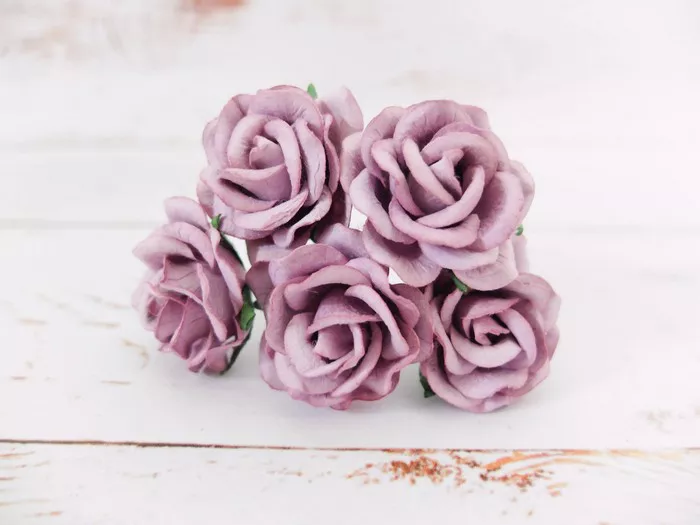
Paper mulberry flowers are delicate and beautiful, adding a touch of elegance to any craft project or home décor. Whether you’re an experienced crafter or a novice looking for a creative outlet, making paper mulberry flowers can be a rewarding and enjoyable activity. In this guide, we’ll walk you through the materials needed and provide a detailed step-by-step process to help you create stunning paper mulberry flowers.
Materials Needed:
1. Mulberry paper: Mulberry paper, also known as rice paper, is the primary material for making paper mulberry flowers. It is lightweight, durable, and comes in a variety of colors.
2. Floral wire: Floral wire will serve as the stem for your paper mulberry flowers. Choose a gauge that is sturdy enough to support the weight of the flower.
3. Floral tape: Floral tape is used to wrap the floral wire and secure the petals and leaves in place.
4. Scissors: A sharp pair of scissors will be necessary for cutting the mulberry paper into the desired shapes.
5. Pencil: A pencil will be used to trace and outline the shapes of the petals and leaves on the mulberry paper.
5. Craft glue: Craft glue will be used to attach the petals and leaves together and to the floral wire.
7. Green floral tape (optional): Green floral tape can be used to wrap the floral wire and give it a more realistic appearance.
8. Watercolor paints (optional): Watercolor paints can be used to add color and dimension to the paper mulberry flowers.
Step-by-Step Guide:
Step 1: Prepare Your Materials
Gather all the materials needed for making paper mulberry flowers. Make sure you have enough mulberry paper in the colors of your choice, as well as floral wire, floral tape, scissors, pencil, craft glue, and any optional materials like watercolor paints or green floral tape.
Step 2: Cut Out Petal and Leaf Shapes
Using your scissors, carefully cut out petal and leaf shapes from the mulberry paper. You can create a template by drawing the shapes onto a piece of cardboard or paper and then tracing them onto the mulberry paper. Experiment with different sizes and shapes to achieve the desired look for your flowers.
Step 3: Shape the Petals
Once you have cut out the petal shapes, gently curl the edges of each petal using your fingers or a round-tipped pencil. This will give the petals a more natural and realistic appearance. Be careful not to tear the paper as you curl the edges.
Step 4: Assemble the Flower
Begin assembling the flower by attaching the petals to the floral wire. Apply a small amount of craft glue to the base of each petal and press it onto the top of the floral wire, spacing them evenly apart. Continue adding petals until you have achieved the desired fullness for your flower.
Step 5: Add the Leaves
Next, cut out leaf shapes from the mulberry paper and attach them to the floral wire using craft glue. Position the leaves along the stem of the flower, alternating sides to create a natural look. You can also curl the edges of the leaves slightly for added dimension.
Step 6: Wrap the Stem
Once the petals and leaves are securely attached, wrap the floral wire with floral tape to cover any exposed wire and create a smooth stem. Start at the base of the flower and work your way down to the bottom of the stem, overlapping the tape as you go. If desired, use green floral tape to give the stem a more realistic appearance.
Step 7: Optional: Add Color with Watercolor Paints
If you want to add color and dimension to your paper mulberry flowers, you can use watercolor paints to paint the petals and leaves. Use a small brush to apply the paint lightly, blending different colors together to create a natural gradient effect. Allow the paint to dry completely before handling the flowers.
Step 8: Display Your Paper Mulberry Flowers
Once your paper mulberry flowers are complete, you can display them in a vase or use them to embellish other craft projects such as wreaths, bouquets, or gift wrap. Get creative and experiment with different colors, shapes, and sizes to create unique and beautiful paper mulberry flowers that will impress everyone who sees them.
Conclusion
Creating paper mulberry flowers is a fun and rewarding craft project that allows you to unleash your creativity and make something beautiful with your own hands. With just a few simple materials and some basic techniques, you can create stunning paper mulberry flowers that will add a touch of elegance to any setting. So gather your supplies and start crafting your own paper mulberry flowers today!


