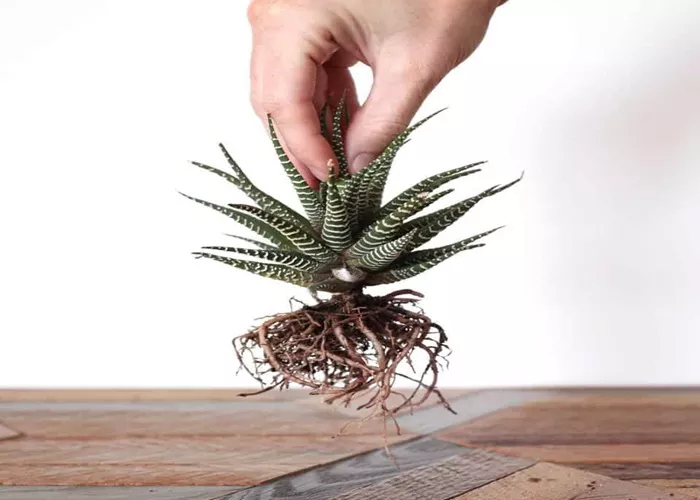
Succulents have gained immense popularity as houseplants due to their unique appearance, low maintenance requirements, and ability to thrive in various environments. However, when you bring a new succulent home, it’s essential to consider repotting it to ensure optimal growth and health. This article will provide a professional guide on how to repot succulents after buying, covering the reasons for repotting, the materials needed, step-by-step instructions, and post-repotting care.
Why Repot Succulents?
Repotting is an important step in succulent care for several reasons:
Root Health: When succulents are purchased from a nursery or store, they often come in small, plastic pots with compacted soil that may not provide adequate drainage or nutrients. Repotting allows you to inspect the roots and remove any that are damaged or rotting.
Soil Quality: The soil in which succulents are sold is often not ideal for long-term growth. It may retain too much moisture or lack the necessary nutrients. Repotting provides an opportunity to use a well-draining soil mix specifically formulated for succulents and cacti.
Pot Size: As succulents grow, they may outgrow their pots, leading to root-bound conditions. Repotting into a larger pot gives the roots more space to expand, promoting healthier growth.
Pest and Disease Control: Repotting allows you to check for pests and diseases that may be present in the soil or on the roots, enabling you to take corrective action before they become a larger issue.
Materials Needed for Repotting
Before you begin the repotting process, gather the following materials:
New Pot: Choose a pot that is 1-2 inches larger in diameter than the current pot. Ensure it has drainage holes to allow excess water to escape.
Potting Mix: Use a well-draining succulent and cactus mix. You can also create your own by mixing regular potting soil with perlite, coarse sand, or pumice in a 1:1 ratio.
Tools: Have a small trowel or spoon, a pair of scissors or pruning shears (for trimming roots if needed), and gloves (optional) for handling the plant.
Water: A small amount of water for lightly moistening the new soil, if necessary.
Stakes or Support: For taller succulents that may need support during the transition.
Step-by-Step Guide to Repotting Succulents
Step 1: Choose the Right Time
The best time to repot succulents is during their active growing season, typically in spring or early summer. Avoid repotting during the dormant season (fall and winter) when the plant is not actively growing.
Step 2: Prepare the New Pot
Clean the Pot: If you’re reusing a pot, ensure it’s clean to prevent disease. Wash it with soapy water and rinse thoroughly, or soak it in a bleach solution (1 part bleach to 9 parts water) for about 10 minutes, then rinse well.
Add Soil: Place a layer of well-draining potting mix at the bottom of the new pot. The amount should be enough to elevate the succulent so that its base is level with the rim of the pot.
Step 3: Remove the Succulent from Its Current Pot
Gently Remove the Plant: Carefully grasp the base of the succulent and gently wiggle it to loosen the roots from the pot. If the plant is stubborn, you can tap the sides of the pot or use a tool to help pry it out. Be cautious not to damage the leaves or stems.
Inspect the Roots: Once removed, examine the root system. Healthy roots should be white or light tan and firm. If you notice any dark, mushy, or rotten roots, use sterilized scissors or pruning shears to trim them away.
Step 4: Place the Succulent in the New Pot
Position the Plant: Place the succulent in the center of the new pot on top of the soil layer. Ensure that the roots are spread out and not crowded.
Fill with Soil: Add more potting mix around the sides of the plant, gently pressing down to eliminate air pockets. Leave about half an inch of space between the top of the soil and the rim of the pot to allow for watering.
Level the Soil: Ensure that the soil is level and that the succulent is stable. If the plant is tall or top-heavy, you may want to use stakes for additional support until it establishes itself in the new pot.
Step 5: Water the Succulent
Initial Watering: After repotting, water the succulent lightly. This helps settle the soil around the roots. Be careful not to overwater; the soil should be moist but not soggy.
Allow for Drainage: Ensure that excess water can drain out of the pot. If water pools at the bottom, it could lead to root rot.
Step 6: Post-Repotting Care
Provide Proper Light: Place the repotted succulent in a location with bright, indirect sunlight. Avoid direct sunlight for the first few days to reduce stress on the plant.
Monitor for Stress: After repotting, keep an eye on your succulent for signs of stress, such as wilting or discoloration. It may take a few weeks for the plant to adjust to its new environment.
Watering Schedule: Resume your regular watering schedule after about a week. Remember to allow the soil to dry out completely between waterings.
Fertilization: Do not fertilize immediately after repotting. Wait at least a month to allow the roots to settle into the new soil before introducing any fertilizers.
Conclusion
Repotting succulents after buying is an essential step in ensuring their long-term health and vitality. By following the steps outlined in this guide, you can provide your new plants with the optimal conditions they need to thrive. Remember to choose the right time, use appropriate materials, and provide careful post-repotting care. With proper attention and care, your succulents will flourish in their new home, adding beauty and life to your space for years to come.


