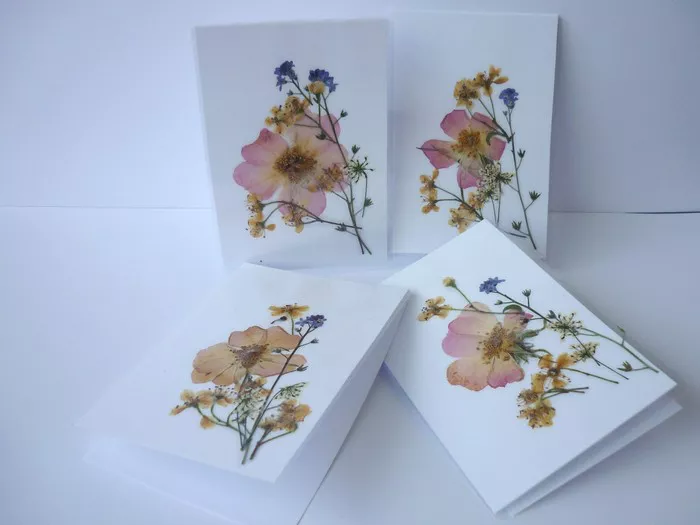
In the age of digital communication, receiving a handwritten note or card carries a special significance. Adding a personal touch to your correspondence can make a lasting impression on the recipient. One charming way to elevate your cards is by incorporating dried flowers, which not only add visual appeal but also evoke a sense of nostalgia and beauty. In this comprehensive guide, we’ll walk you through the materials needed and step-by-step instructions to create your own stunning dried flower cards.
Materials Needed:
1. Assorted Dried Flowers: Choose a variety of dried flowers in different colors, shapes, and sizes. Roses, lavender, baby’s breath, and daisies are popular choices for their delicate appearance.
2. Cardstock or Blank Cards: Select high-quality cardstock or blank cards in the desired size and color. White or cream-colored cards work well as a backdrop for the dried flowers.
3. Craft Glue or Adhesive: Opt for a strong, clear-drying craft glue or adhesive that is suitable for bonding paper and botanicals.
4. Tweezers or Small Tongs: These tools will help you handle the delicate dried flowers with precision and ease.
5. Scissors or Craft Knife: Use scissors or a craft knife to trim the stems of the dried flowers to the desired length.
6. Parchment Paper or Wax Paper: Lay parchment paper or wax paper on your work surface to protect it from glue and prevent sticking.
7. Optional Embellishments: Consider adding additional embellishments such as ribbons, sequins, or glitter to enhance the aesthetic appeal of your dried flower cards.
Step-by-Step Guide:
Step 1: Select Your Dried Flowers
Begin by selecting a variety of dried flowers that complement each other in color, size, and texture. You can either purchase pre-dried flowers from a craft store or dry your own flowers using a flower press or by hanging them upside down in a dark, dry place for several weeks. Ensure that the flowers are completely dry to prevent mold or mildew.
Step 2: Prepare Your Workspace
Cover your work surface with parchment paper or wax paper to protect it from glue and make cleanup easier. Organize your dried flowers, adhesive, cards, and any additional embellishments you plan to use within reach for easy access.
Step 3: Arrange Your Design
Experiment with different arrangements and compositions for your dried flower cards. Lay out your selected flowers on the cardstock or blank cards until you’re satisfied with the design. Consider factors such as color balance, symmetry, and focal points as you arrange the flowers.
Step 4: Adhere the Dried Flowers
Once you’ve finalized your design, carefully apply a small amount of craft glue to the back of each dried flower using a toothpick or small paintbrush. Be sure to use a minimal amount of glue to avoid excess seepage. Use tweezers or small tongs to carefully place each flower onto the cardstock or blank card, pressing gently to ensure adhesion. Continue this process until all of your dried flowers are securely attached.
Step 5: Allow to Dry
Allow your dried flower cards to dry completely before handling or displaying them. Depending on the type of glue used, drying times may vary, so refer to the manufacturer’s instructions for guidance. Avoid disturbing the cards while they’re drying to prevent shifting or misalignment of the flowers.
Step 6: Add Optional Embellishments
If desired, enhance the aesthetic appeal of your dried flower cards by adding optional embellishments such as ribbons, sequins, or glitter. Use craft glue to adhere these embellishments to the cards, taking care not to overwhelm the delicate beauty of the dried flowers.
Step 7: Personalize Your Message
Once your dried flower cards are fully dry and decorated to your liking, it’s time to personalize them with a heartfelt message. Use a fine-tip pen or calligraphy pen to write your message inside the card, expressing your sentiments in your own words. Consider including a meaningful quote, poem, or anecdote to further personalize the card for the recipient.
Step 8: Share and Enjoy
Finally, share your handmade dried flower cards with friends, family, or loved ones to brighten their day and convey your thoughtful sentiments. Whether it’s for a special occasion or just to say hello, receiving a handmade card adorned with delicate dried flowers is sure to make a lasting impression and bring joy to the recipient.
Conclusion
In conclusion, creating dried flower cards is a delightful way to add a personal and artistic touch to your correspondence. By following this step-by-step guide and gathering the necessary materials, you can craft stunning cards that capture the timeless beauty of dried flowers and convey your heartfelt sentiments with elegance and grace. Enjoy the creative process and the joy of sharing your handmade creations with others!


