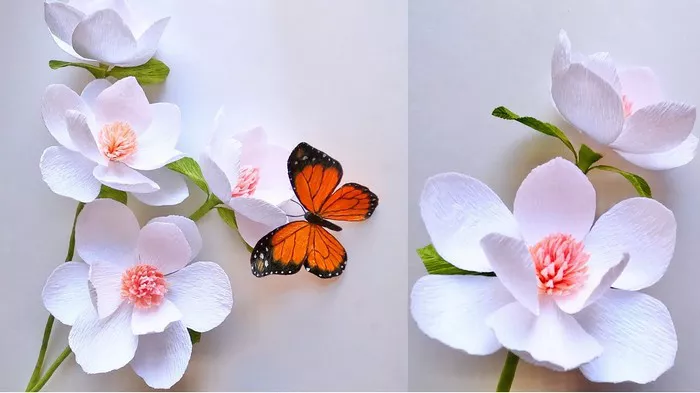
Magnolia flowers are renowned for their elegant beauty and delicate fragrance. Recreating these stunning blooms with paper offers a timeless craft project that can be enjoyed by beginners and experienced crafters alike. In this comprehensive guide, we will walk you through the process of making lifelike paper magnolia flowers, providing detailed instructions along with a list of materials needed to get started.
Materials Needed:
1. Crepe paper in white, pink, and green hues
2. Floral wire
3. Floral tape
4. Scissors
5. Hot glue gun and glue sticks
6. Green floral tape
7. Wire cutters
8. Pencil
9. Template (optional, can be found online or created manually)
10. Craft glue
11. Thin green paper for leaves (optional)
Step-by-Step Guide:
Step 1: Prepare Your Materials
Gather all the materials listed above in a well-lit and spacious workspace. Ensure you have ample crepe paper in white, pink, and green shades. Cut the floral wire into various lengths, considering the desired size of your magnolia flowers. Have scissors, a hot glue gun with glue sticks, floral tape, wire cutters, a pencil, and optional templates ready.
Step 2: Cut Petal Shapes
Begin by selecting the appropriate template for your magnolia petals or create your own by drawing petal shapes on paper. Using sharp scissors, carefully cut out the petal shapes from the white and pink crepe paper. Aim for diversity in sizes to mimic the natural variation in magnolia petals.
Step 3: Shape the Petals
Take each petal and gently stretch and curl its edges using your fingers or a pencil. Start at the base of the petal and work towards the tip, creating a slight curl to add dimension. Avoid excessive force to prevent tearing the delicate crepe paper. Repeat this process for all the petals, ensuring each one has a natural curve.
Step 4: Assemble the Flower
Begin assembling the magnolia flower by taking a small white petal and wrapping it around the tip of a piece of floral wire. Secure the petal in place with floral tape, wrapping it tightly around the base of the petal and the wire. Add additional petals, alternating between white and pink, and gradually increasing the size as you move towards the center of the flower. Use small dabs of hot glue to secure the petals in place if needed, being careful not to apply too much glue to avoid making the flower stiff.
Step 5: Create the Center
Cut a small circle of yellow or green crepe paper for the center of the flower. Crumple the paper slightly to add texture, then apply a small amount of hot glue to the base of the petals and press the center circle into place. Ensure the center is securely attached and covers the base of the petals.
Step 6: Add Details
To enhance the realism of your paper magnolia, consider adding subtle details such as gently brushing the edges of the petals with pastel chalk to create shading and depth. Use a fine-tipped marker to draw delicate veining on the petals, mimicking the natural patterns found in magnolia blooms.
Step 7: Make Leaves (Optional)
If desired, cut leaf shapes from thin green paper or use pre-made artificial leaves. Attach the leaves to the stems using floral tape, positioning them at various intervals along the stem to replicate the natural arrangement of magnolia foliage.
Step 8: Arrange and Display
Once you have created multiple paper magnolia flowers, arrange them in a vase or use them to decorate wreaths, centerpieces, or other floral arrangements. Experiment with different color combinations and sizes to achieve the desired aesthetic. Display your paper magnolia creations proudly and enjoy their beauty year-round.
Conclusion
Crafting lifelike paper magnolia flowers requires attention to detail and patience but yields stunning results that can be enjoyed for years to come. By following these detailed steps and unleashing your creativity, you can create beautiful paper magnolia blooms that capture the timeless elegance of the natural flowers. So gather your materials, set up your workspace, and embark on this rewarding craft project today!


